The Daily Skein

All the craft that’s fit to make.

Lunaria December 7, 2010

Filed under: patterns — Cailyn @ 10:23 pm
Tags: , , , , ,

I love designing, but sometimes I get stuck in an item rut.  You know, sock after sock pattern or just too many mittens in a row.  I love it when people give me ideas of items to design, especially if it’s a type of item that I’ve never made before, like leg warmers or a shawl.  Last Thanksgiving, my aunt was admiring my Snowflake Gloves and Wintergreen Gloves, which I had given to my sister.  My aunt said that she loved fingerless gloves for walking the dog but what she really needed was a hooded scarf, maybe with pockets to put the gloves in.  I jumped at the idea- a matching pair of fingerless gloves and a hooded scarf.


And it only took me one year to complete!


I finished the design for the gloves fairly quickly; per request, the colors were rich purples and cheery pinks.  The actual execution of the design took a lot longer.  Deadlines kept popping up and the gloves got pushed aside time and again.  I got one finished but then didn’t finish the second until two months later!  The scarf design went slower.  I wanted the same color work pattern from the gloves, but I detest knitting back and forth with two yarns.  I knew I’d never get it done if I did it that way.  On the other hand, I didn’t want to knit the entire scarf in fingering yarn in the round- that could take forever!  I eventually settled on working the color work in the round for the pockets and keeping the rest of the scarf in a solid color with a cushy stitch pattern.  What resulted is a hooded, pocketed scarf with no sewing or flat stranded knitting required.  So, exactly one year after I took on the glove and scarf project, I finished and presented them to my (very patient) aunt.  She loved them!


Lunaria is now up for sale at Knit Picks as a combined pattern set.  Both use seven colors of Palette yarn.  The scarf is worked with a double strand of yarn throughout, so it works up faster.


   113_5310  


The hooded scarf has two color work pockets and a dense slip stitch rib pattern for the main body. The slip stitch pattern is completely reversible, as are the pockets. The whole scarf, including the pockets, is worked with the yarn held doubled. The two halves of the scarf are made, then the hood is cast on between them and the whole hood is worked together with the scarf halves to the end. A three-needle bind off neatly avoids having to sew the hood together.


 113_5305  


The gloves are worked with a single strand.  They feature a long ribbed cuff, accented with a few stripes, and a traditional side thumb gusset, increased every third row.


110_5279   000_0098


The pair of projects is named after the flower the Annual Honesty , or Lunaria annua, which has four petals ranging from white to deep purple when in bloom. The seeds are papery, translucent sliver discs in the winter, giving it its other common name in America, “Silver Dollars.”


image


Who’s Really Sane? November 1, 2010

Filed under: Knitting Projects,Musings — Cailyn @ 4:06 pm
Tags: , , ,

Early Saturday morning, Lowell and I headed downtown.  We grabbed some coffee and piroshkies from Pike Place Market.  Then, wrapped up against the rain and cold, we stood around for a half an hour at West Lake Center.


Why?  Because we’re very punctual (read: “unreasonably worried about parking”) people.  We wanted to get a good spot at the Seattle satellite Rally to Restore Sanity and/or Fear.  We did indeed get a good spot.  The weather even started out nice enough for me to think that the long underwear had been overkill.  (I was soon glad I had it.)  I had come prepared to the rally- no signs, no flag pin, but I did have a bag full of yarn!


5135198650_3475edabf4_b


It wasn’t too cold- until the rain started.  As the first comedian performing, David Crowe, said, “A rally at 9 am, outside, in Seattle, in October?  What’s sane about that?”  That’s when the long underwear seemed like a really good idea.  I put on my Snowflake Gloves  and continued to knit.  I was pretty surprised that I didn’t see anyone else with some knitting… but it was pretty cold and wet, so maybe that weeded out the mostly-sane among us.


IMAG0186 - Copy 

(Of course, I can’t actually show you what I was working on.  You know the drill.  Meet my new scarf design- I call it Blurple.)


Things got more interesting when we were interviewed by one of the local TV stations, Q13.  Now, usually I have a pretty good “I’m friendly, but not really interested in conversation” vibe going on when I’m out and about.  I’m a shy person most of the time.  But that morning I had a mini American flag stuck in my ponytail, I was grooving to the music, and I was knitting in the middle of the rain.  What’s sane about that?  The reporter pointed the camera and mike at me first, so I babbled something then threw the next question over to Lowell, who is normally better at these sorts of things.  Apparently I speak more in soundbites, though, because she quickly thrust the camera back at me and asked me more questions.  Luckily, after the first discombobulated answer, I was at least somewhat more composed for the follow-ups.  You can’t see it in the video, but I was knitting the whole time I was being interviewed.  Lowell is pretty sure that it was the knitting that made her come over, even though she didn’t ask about it, because later on, she snuck up behind me and filmed me knitting over my shoulder for about four minutes.  Lowell nicely informed me of that when she was done.  Sadly, none of the knitting made it into the final footage (then again, neither did my babbling), but I feel like I’ve tied this bit of fame back to the fiber arts enough to put it on the blog.


http://www.q13fox.com/news/kcpq-thousands-of-people-answer-the-103010,0,2684804.story

You can hear my silly soundbite at 0:36, but I appear in a crowd pan around the 20 second mark too. (I have to apologize, the video embed isn’t working from the Q13 website, so you’ll have to click on the link to see my stupidity! –edited 11/2)


Giant head of Cailyn says, “Vote!”

Giant head of Cailyn says, “Vote!”


The funny part was that after the Q13 interview, we were approached by the “man on the street” interviewer.  That one was live on the jumbo-tron.  Lowell answered more than I did that time, but I did get to say something on the jumbo-tron.  I’m not sure that it’s an achievement.  Good thing that one hasn’t made it onto the internet yet!  I think the knitting caught his eye too.  Apparently the lesson is, if you don’t want to be interviewed on TV or for the jumbo-tron, knit discreetly.


Ok, enough embarrassment.  For now.


Wintergreen Gloves October 5, 2009

Filed under: patterns — Cailyn @ 9:34 am
Tags: , , , ,

100_3825


These cute fingerless gloves are inspired by traditional Selbu mittens.  The construction differs from the historical mittens and uses a thumb gusset on the side of the hand instead of a gusset on the palm, but the motifs are all taken from traditional patterns.  I can’t decide if the main motif reminds me of hearts, mint leaves, or snowflakes.  The construction is essentially the same as the Snowflake and the Albuquerque Fingerless Gloves.  But these gloves only use five colors (and the background color doesn’t change)!  I love knitting these style gloves.  They seem to knit up faster than other projects, probably because the pattern changes every row- it’s very addicting!  And there’s no fingers to mess with.  I’ve found that wearing these over a thin glove liner is just about perfect for Seattle mornings and of course they’re great for typing in cold offices or computer rooms.


There are separate mirrored charts for the right and left glove for easier knitting (no reading from left to right while knitting right to left!) Charts are available in color and symbols below and in the PDF. To make finishing less painful, weave in ends as you go by twisting/wrapping the last yarn for 10-15 sts on the new row. Try joining the new color 10- 15 sts early (the row before it appears on the chart) and carry it along, twisting/wrapping it every other st. This helps eliminate holes at the sides.


The increases for the thumb gusset are written as yarn overs which are knit twisted on the next round. Standard lifted increases can be substituted; the yarn over method can prevent puckering or tension problems from lifting the strands from below. I recommend marking the increases for the thumb with two stitch markers: place the first one before the first YO and the second one after the second YO on the first increase row. Slip the markers every round after this; it will make it easier to know which stitches to put on the scrap yarn when the gusset is finished.


These gloves can be knitted from the charts alone between the ribbing sections, but instructions have been written for rows with increases, decreases, or other things that need attention. If there are no written instructions for a row, follow the chart until the next written row.


100_3830

Wintergreen Gloves

Download the PDF: Wintergreen Gloves

  • Finished Size: Hand circumference, 7”; Length, 7”
  • Needle Size: Size 0 (2.00mm) DPNs
  • Gauge: 38 sts x 26 rows = 4” in two-color stockinette
  • Yarn: Knit Picks Palette (100% wool) 1 ball each (231yd/50g): White, Sky, Pool, Tidepool Heather, Marine Heather
  • Notions: 12” smooth waste yarn, tapestry needle

Errata

11/7/09- Fixed column numbers along the bottom of the charts; numbers now count correctly by 5’s instead of "1, 5, 10, 11, 15."  Fixed written instructions to Round 39.

12/9/09- Fixed gauge error.

1/26/10- Fixed decrease round before Top Ribbing; “k2tog, k6” has been changed to “k2tog, k5”

3/21/11- Fixed increase errors in thumb gussets; the first two rounds of the gusset have changed.  The first round has only 1 increase, the second has two instead of the first increases being on the palm/back of hand.

Special Stitches

YO R: Bring yarn to the front by going over the top of the right needle and return to the back under the needle. On the next round, knit into the front of the yarn over.

YO L: Bring yarn to the front by going under the right needle and return to the back over the top of the needle. On the next round, knit into the back of the yarn over.

Cuff (Work the same for both gloves)

In White, CO 60 sts. Join in the round, being careful not to twist.

Round 1: *K2, p2* to the end of the round.

Repeat Round 1 until cuff measures 1 inch.

In Sky, *k2, p2* to the end of the round.

In White, *k2, p2* to the end of the round.

In Pool, *k2, p2* to the end of the round.

In White, *k2, p2* to the end of the round.

In Tidepool Heather, *k2, p2* to the end of the round.

In White, *k2, p2* to the end of the round.

Repeat last round until cuff measures 2” from cast on.

Hand

Increase Round: K3, m1 *k6, m1* 9 times, k3. 70 sts

Work Right Hand Chart [Left Hand Chart] for 38 rounds, changing colors where indicated on chart and increasing stitches where indicated. It is helpful to place a stitch marker before the first increase and after the second increase to mark the thumb stitches.

Next Round: Work round 39 of chart for 36 [34] sts, slip all 19 thumb stitches to scrap yarn, CO 3 stitches in White using the backwards loop method over the gap. Continue round 39 of chart. 73 sts

Continue working chart until round 52 is completed, decreasing where indicated.

Top Ribbing (Work the same for both gloves)

Round 53 (not shown on chart): K3, *k2tog, k5* 9 times, k2tog, k2. 60 sts

Ribbing: *K2, p2* to the end of the round.

Repeat Ribbing until ribbing measures 1/2 inch.

Cast off loosely, cut yarn and weave in ends.

Thumb (Work the same for both gloves)

Return 19 thumb sts to needles, removing waste yarn.

Join White at the beginning of the thumb on the back of the hand. Knit across all thumb sts, working YOs as before. Pick up 5 sts across the gap (1 in each of the cast on stitches and 1 in either “corner”). 24 sts

Round 1: K18, k2tog, k3, k2tog (joining the first and last st of the round). 22 sts

Round 2: *K1, p1* to the end of the round.

Repeat Round 2 until thumb ribbing measures ¾”.

Cast off loosely, cut yarn and weave in ends.

Color Charts (click on charts for larger image)


Key Color

R Chart 2  L Chart 2

Symbol Charts (click on charts for larger image)


Key Symbol

R Chart S 2  L Chart S 2

100_3823

Please Note: I post my patterns as soon as I’ve completed them because I’m excited to share them with you. They have not been fully tested, but they are free. I’ve made every effort to make sure that the instructions are clear and error-free. There may be typos or pattern mistakes and if you find them or have any questions, please let me know by posting a comment or emailing me, dailyskein at gmail.com.

Creative Commons License
This work by Cailyn Meyer is licensed under a Creative Commons Attribution-Noncommercial-Share Alike 3.0 United States License.


Round One March 31, 2009

Filed under: Knitting Projects,Musings — Cailyn @ 3:27 pm
Tags: , , , , , ,

I started creating PDFs of all my patterns a few months ago.  If you’re on Ravelry, you might have seen that you can download the PDFs from the pattern pages.  But apparently I never put the PDFs on the blog!  I’m not sure how that slipped my mind.  It might be because my mind is slowly becoming a jelly-like substance that things only occasionally stick to.  I don’t have all the patterns completed yet, but here is Round One, freshly uploaded onto the WordPress servers.


Albuquerque Gloves

Cruiser

Snowflake Fingerless Gloves

Arthurian Anklets

Crystalline Socks

Danube Socks

Socks, circa 2008

Emily’s Scarf

Fireflake Hat

Felted Mousie


The link to download the PDF is located just under the pattern title and just above the pattern information, like this:


Untitled


Patterns not yet PDFed:

WRX

Shenandoah Socks

Grand Tetons Socks


WRX November 14, 2008

Filed under: Knitting Projects,patterns — Cailyn @ 2:06 pm
Tags: , , , , ,

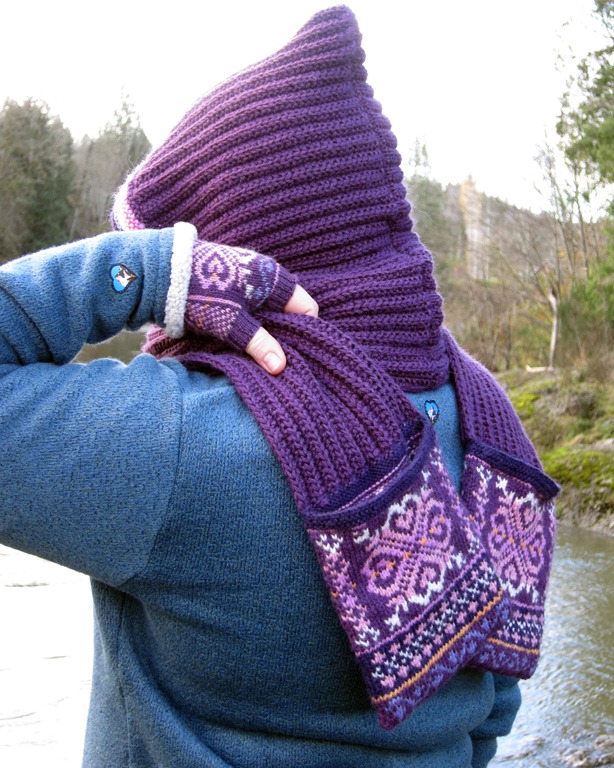
Remember, a few months back, I said I was knitting on some secret projects?  Well, one of them was a project that I submitted to Knitty for the winter edition.  My pattern made it to the final cut… and just didn’t quite make it past that.  Oh well, next time maybe; I’ve got a few ideas.  I’m thrilled that the pattern got so far in the process, really.  This just means that I get to show the project to you now instead of having to wait until mid-December.  It’s been killing me not to show these off!  (And I still have the other designs I submitted to the Knitting-Pattern-a-Day Calendar that I can’t tell you about, oy.)


A

Lowell came to me one day and said that he’d really like fancy driving gloves to match his new WRX. Not one to back down from a challenge- er request, we scoured local yarn shops and the Internet for just the perfect shade of yarn in “Impreza blue” to match the car. He wanted something shiny and, in his words, “fast.” The yarns we decided on were not only an almost perfect color match; they’re also soft and luxurious. I love the natural shine of the silk and silk/wool blend. These gloves are knit with only a few rows of ribbing and then a mesh back adds some sportiness to the gloves. The first glove works across the back of the hand and then the palm; the left glove works across the palm and then the back of the hand. These gloves work up to the color work band shockingly fast. The larger size fits an average man’s hand. The smaller size is about a women’s medium.  They’re pretty stretchy, but be careful to keep the floats loose during the color work. Personally, I think these gloves would look stunning in black and Ferrari red.  (For more information about knitting glove fingers, check out Knitting In Color’s technique posts.)


C       B
WRX

Download the PDF: WRX

  • Finished Size: Women’s medium/Men’s medium, circumference 7 1/2", length 5"; Men’s large, circumference 8 1/2", length 6"
  • Needles: Size 2 (2.75mm) double-point needles
  • Yarn: MC – Argosy Luxury Fibers Hanna Sport, Blue Mills (1 [1] skein) CC: Alchemy Yarns Silk Purse, 36F Lantern (1 [1] skein)
  • Extras: Tapestry needle, two stitch markers, 3 6" pieces of smooth scrap yarn or stitch holders
  • Gauge: 30 sts/42 rows = 4" in stockinette stitch

Errata: 10/26/10 – fixed some formatting, removed extra Round 8 from Left Glove

Special Stitches

M1R: Insert left needle tip into the strand between stitches from back to front and knit into the front of the loop.

M1L: Insert left needle tip into the strand between stitches from front to back and knit into the back of the loop.

Mesh Pattern:

Round 1: K1, *YO, ssk* over next 18 [20] sts, k1. 

Round 2: Knit


Right Glove

Cuff

Using the Twisted German Cast On or the Long Tail Cast On, CO 40 [44] sts. Distribute evenly between the needles.

Join to begin working in the round, being careful not to twist.

Round 1: *K1, p1* to end.

Repeat Round 1 2 more times.

Round 4: In CC, knit 1 round. (This keeps the “purl dots” of the other color from showing and makes the stripe look smoother).

Round 5: *K1, p1* to end. Break CC.

Round 6: In MC, knit 1 round.

Round 7: *K1, p1* to end.


Hand and Thumb Gusset

Round 8: K20 [22], k1, M1L, k10, M1L, k1 to 1 st before the end of the round, M1L, k 1. 3 sts increased. 43 [47] sts.

Round 9: Work Round 1 of Mesh Pattern, then knit to the end of the round.

Round 10: Work Round 2 of Mesh Pattern, then knit to the end of the round.

Repeat Rounds 9-10 1 [2] more times.

Next round: Work next round of Mesh Pattern, place marker, M1R, k1, M1L, place marker, knit to the end of the round.

Work 2 rounds even, working the Mesh Pattern as established.

[Thumb increase round: Work Mesh Pattern to marker, slip marker, M1R, knit to next marker, M1L, slip marker, knit to the end of the round.  2 sts increased.

Work 2 rounds even, working the Mesh Pattern as established.]

Repeat instructions between brackets until there are 15 [19] sts between the markers, ending after the second even round.

Next round: K1, M1L, k18 [20], M1L, k1. Place all sts between the markers on scrap yarn or a stitch holder (markers can be removed now). CO 3 sts, rejoin round, and knit to the end of the round. 15 [19] sts removed, 5 sts increased. 48 [52] sts.

Knit 24 [27], k1, M1L, knit to 1 before the end of the round, M1l, k1. 2 sts increased. 50 [54] sts.

Size L only: Work 1 round even.


Swirl Color Work Band WRX Chart(click on the chart to enlarge)

Size S: K13, M1L, k26, M1L, k13, M1L.  2 sts increased. 52 sts.

Size L: K13, M1L, k13, M1L, k13, M1L, k13, M1L, k to end of round.  4 sts increased. 58 sts.

Both sizes: Join CC and work Right Swirl Chart for 15 rounds. The chart within the red lines repeats 3 times.  Work the first 3[5] sts once, then the next 16 sts 3 times, then the last 3[5] sts once.

Next round: K1, k2tog, k20 [23], k2tog, k2, k2tog, k20 [23], k2tog, k1.  4 sts decreased. 48 [54] sts.

Next round: K38 [48]. Place next 10 [12] sts (the last 5 [6] and the first5 [6] of the round) on scrap yarn or a stitch holder for the pinky. CO 2 sts at the end of the round and rejoin in the round.  10 [12] sts removed, 2 sts increased. 40 [48] sts.

Knit 2 rounds.


Ring Finger

K6, place the next 28 [31] sts on scrap yarn or a stitch holder, CO 2 [3] sts, k8 [8]. 16 [17] sts.

Work 8 [10] rounds even.

Next round, S: *k1, p1* to the end.

Next round, L: *k1, p1* until 1 st before the end of the round, k1.  (This will keep the edge from curling.)

Bind off sts using EZ’s Sewn Bind Off.

Middle Finger

Return 7 [7] sts from the back of the hand and 7 [7] sts from the palm on the needles.

Join yarn at the back of the hand and k7, CO 3 [2] sts, k7, pick up and knit 4 sts along the cast on edge of the ring finger. 21 [21] sts.

Next round: K1, k2tog, k11, k2tog, k4. 2 sts decreased. 19 sts.

Work 8 [10] rounds even.

Next round: *k1, p1* until 1 st before the end, k1.

Bind off sts using EZ’s Sewn Bind Off.

Index Finger

Return remaining sts to needles.

Join yarn at the back of the hand and k12 [15], pick up and knit 4 sts along the cast on edge of the middle finger.  18 [19] sts.

Next round: K1, k2tog, k8 [9], k2tog, k4. 2 sts decreased. 16 [17] sts.

Work 7 [9] rounds even.

Next round, S: *k1, p1* to the end.

Next round, L: *k1, p1* until 1 st before the end, k1.

Bind off sts using EZ’s Sewn Bind Off.

Pinky

Return pinky sts to needles.

Join yarn at the palm side, k10 [12], pick up and knit 4 sts along the cast on edge of the ring finger. 14 [17] sts.

Next round: K1, k2tog, k4 [7], k2tog, k4.  2 sts decreased. 12 [15] sts.

Work 6 [8] rounds even.

Next round: *k1, p1* until 1 st before the end, k1.

Bind off sts using EZ’s Sewn Bind Off.

Thumb

Return thumb sts to the needles.

Join yarn and k15 [19], pick up and knit 5 sts along the cast on edge of the hand.  20 [24] sts.

Next round: K2, *k2tog, k3 [4],* three times, k2tog, k1 [2].  4 sts decreased. 16 [20 sts.]

Work 8 [10] rounds even.

Next round: *k1, p1* to the end.

Bind off sts using EZ’s Sewn Bind Off.


Left Glove

Work Cuff as for Right Glove.


Hand and Thumb Gusset

Round 8: K20 [22], k1, M1L, k10, M1L, k1 to 1 st before the end of the round, M1L, k 1.  3 sts increased. 43 [47] sts.

Round 8: K1, M1L, k8 [10], M1L, k8 [10] M1L, k26 [26]. 3 sts increased. 43 [47] sts.

Round 9: K 22 [25], then work Round 1 of Mesh Pattern.

Round 10: K22 [25], then work Round 2 of Mesh Pattern.

Repeat Rounds 9-10 1 [2] more times.

Next round: k21 [24], place marker, M1R, k1, M1L, place marker, work next round of Mesh Pattern.

Work 2 rounds even, working the Mesh Pattern as established.

[Thumb increase round: Work Mesh Pattern to marker, slip marker, M1R, knit to next marker, M1L, slip marker, knit to the end of the round.

Work 2 rounds even, working the Mesh Pattern as established.]

Repeat instructions between brackets until there are 15 [19] sts between the markers, ending after the second even round.

Next round: K1, M1L, k18 [20], M1L, k1. Place all sts between the markers on scrap yarn or a stitch holder (markers can be removed now). CO 3 sts, rejoin round, and knit to the end of the round. 15 [19] sts removed, 5 sts increased. 48 [52] sts.

Size L only: Work 1 round even.


Swirl Color Work Band (click on the chart above to enlarge)

Size S: K13, M1L, k26, M1L, k13, M1L. 2 sts increased.  52 sts.

Size L: K13, M1L, k13, M1L, k13, M1L, k13, M1L, k to end of round. 4 sts increased.  58 sts.

Both sizes: Join CC and work Left Swirl Chart for 15 rounds.  The chart within the red lines repeats 3 times.  Work the first 3[5] sts once, then the next 16 sts 3 times, then the last 3[5] sts once.

Next round: K1, k2tog, k20 [23], k2tog, k2, k2tog, k20 [23], k2tog, k1.  4 sts decreased. 48 [54] sts.

Next round: K38 [48]. Place next 10 [12] sts (the last 5 [6] and the first 5 [6] of the round) on scrap yarn or a stitch holder for the pinky. CO 2 sts at the end of the round and rejoin in the round. 10 [12] sts removed, 2 sts increased. 40 [48] sts.

Knit 2 rounds.

Next round: K38 [48]. Place next 10 [12] sts (the last 5 [6] and the first5 [6] of the round) on scrap yarn or a stitch holder for the pinky. CO 2 sts at the end of the round and rejoin in the round. 10 [12] sts removed, 2 sts increased. 40 [48] sts.

Knit 2 rounds.

Work the fingers and thumb for the left glove the same as for the right glove.


Finishing

Weave in all ends. Use tails and/or left over yarn to conceal any holes around the base of the fingers.  Lightly steam block if desired.

 G


Please Note: I post my patterns as soon as I’ve completed them because I’m excited to share them with you. They have not been fully tested, but they are free. I’ve made every effort to make sure that the instructions are clear and error-free. There may be typos or pattern mistakes and if you find them or have any questions, please let me know by posting a comment or emailing me, dailyskein at gmail.com.


Creative Commons License
This work by Cailyn Meyer is licensed under a Creative Commons Attribution-Noncommercial-Share Alike 3.0 United States License.