The Daily Skein

All the craft that’s fit to make.

How to Use a McMorran Balance for Fun and Profit August 9, 2011

Filed under: Spinning Tutorial — Cailyn @ 4:23 pm
Tags: , ,

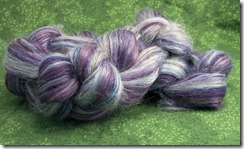
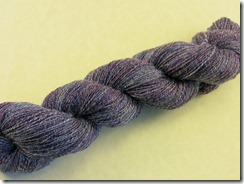
I am addicted to spinning lace yarn right now.  I don’t know why.  I’ve always been attracted to tiny crafts- I used to make little tiny sculptures from polymer clay.  Before that, I would “miniaturize” anything I learned, like “god’s eyes” (I think I was about 8 when I learned that one).  Once I got the hang of making one with popsicle sticks and worsted yarn, I started making them with toothpicks and embroidery floss.  So I guess it was really just a matter of time before I found the tiny singles of laceweight.  Before I left for Sock Summit, I finished up this pretty skein.


115_5643


It’s spun from a 70% merino/30% silk blend that I bought a few years back, one of my first fiber purchases!


Weaving Works Merino-Silk  115_5646


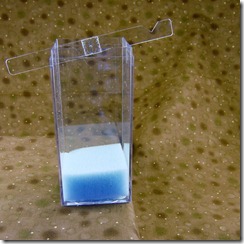
I don’t knit much lace, though, so I offered this skein to a friend who loves purple.  Since I wanted to know how much I was giving her, I pulled out my McMorran balance.  A McMorran balance is a nice, inexpensive little piece of equipment made from, basically, an acrylic box with some slots in it and an acrylic arm that wobbles.  The magic is in the calibration.  It’s calibrated to measure 1/100th of a pound.  (Metric versions can be purchased if you’re not down with the inches and ounces.)  Here’s what I did to measure my handspun (using some green Cascade 220 as the yarn, because lace yarn doesn’t show up well in photos):


115_5647


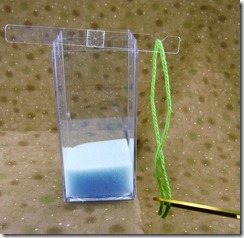
Here’s the McMorran balance sitting on the edge of a book.  You’ll see why it’s on a book shortly.  See how the notched part of the arm is tilted up?  That means the weight of the notched end is lighter than the solid end.  Let’s add some yarn!


115_5648


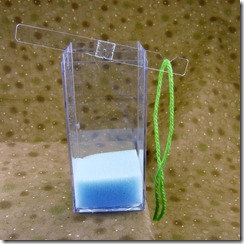
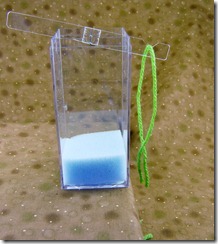
Cut off a 6-10" piece of the yarn you’re measuring.  The thinner/lighter the yarn, the longer the piece you’ll need (laceweight might need a much longer piece, or several pieces).  This piece is much heavier than the solid end of the arm.  You can see that the ends of the yarn are below the bottom of the balance- that’s why it’s a good idea to place the scale at the edge of a table, so that the yarn can hang freely.


115_5649 115_5650


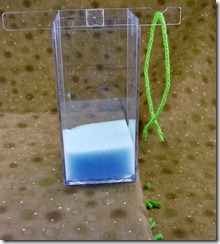
Cut off a little bit of the yarn, then let the scale settle back.  Is it balanced (is the arm horizontal/not tilted)?  If not, trim off another little bit.  The key here is to trim off just a tiny bit each time.  You can always cut more off, but it’s not easy to fix if you overshoot!


115_5654


When the arm is horizontal, remove the piece of yarn and measure it with a ruler.  Don’t stretch it out so it’s taut, but you want it to be straight.  Let’s say this piece is 6” long.  Now for a little math:


Multiply the length of yarn by 100.  (6 inches x 100 = 600)


The resulting number is your “yards per pound” or ypp.  (600 ypp)


Chances are good that you don’t have a full pound of yarn, though!  Divide the number above by 16 (the number of ounces in a pound) to get the “yards per ounce” or ypo.  (600 ypp/16 oz = 37.5 ypo)


Now weigh your skein.  Multiply the weight of your skein by the ypo.  (2.3 oz x 37.5 ypo= 86.25 yards)


The final number is how many yards are in your skein.  (86.25 yards)


The instructions are the same for a metric version, but the math at the end is a little different.  I haven’t actually found the calculation online anywhere, but the balances come with the formula.


So, in the end, it turns out that I have about 400 yards of my handspun laceweight.  Not bad!
 

Turning a Batt into Rolags February 11, 2011

Filed under: spinning,Spinning Tutorial — Cailyn @ 2:25 pm
Tags: ,

115_5473


Rolags are a woolen spinning preparation.  Because of their structure, the fibers wrap and twist around each other and keep a core of air in the yarn.  This makes the yarn super warm.  It’s also very soft.  Rolags are usually made on hand cards, but if you don’t have hand cards you can tear up a batt into rolags.  You could roll up the batt into one huuuuuge rolag, actually.  A batt is what comes off of a drum carder, but it’s really just a big version of what comes off of a set of hand cards.  As far as I know, you can make rolags any size you want them.


115_5427


Unfold and unroll your batt onto a smooth surface, like a wood table.  You don’t want to do this on carpet!  The first time I did this, I was sitting on a hardwood floor.  The surface pictured is a laminate table from Ikea.


Notice how the batt has a “grain”?  The fibers aren’t perfectly aligned, but they are generally pointed left to right.  Turn the batt so that the “grain” is pointing towards you.  We’re going to strip the batt.


115_5428  115_5430


Decide how wide you want your strips.  The width of the strip will become the length of the finished rolag.  Last time, I used the width of my closed hand as a guideline (about 5”), but I found those rolags to be a little short especially when had to switch to my wheel instead of the spindle.  This time, I used the width of my spread hand (about 7”).  You can, of course, use an actual ruler or a book or anything for this step.  Once you’ve got a width decided on, gently strip the batt upwards along the “grain.”


115_5431


You should end up with a strip of fiber in your desired width.


115_5460  115_5436


Turn the strip so the grain is horizontal again.  Place your hand or a straight edge on the strip about a staple-length in.  Make sure that you’ve got all the fibers under your hand or straightedge (you may have to scrunch the strip a little) and press down firmly.


115_5438


Grasp the end of the strip in your other hand and pull gently.  If the pulling takes a lot of force, try moving your pressing hand forwards or backwards- likely your hand is not at the staple length.  Now, you don’t have to have the rolag be one staple length wide- you can put your hand two staple lengths in (just don’t pull from the end to tear the piece off), or just roll up the whole strip!


115_5461  115_5463  115_5464


You should end up with something like this.  The ends might be kind of raggity.  Unless it’s really ugly, don’t worry about it.  (I pulled that little bit of green fiber off the last piece there.)


115_5465  115_5466  115_5468


Start rolling the fibers up in the direction of the grain, from left to right.  This way, when you spin, the fibers will tangle around themselves- in a good way!  (If you roll from top to bottom, you get a semi-worsted preparation where the fibers are mostly aligned- I just learned that!)  Keep rolling until you get to the end of the piece, trying to keep the ends from flaring out too much.  Use a gentle touch.  I like to give my rolags a light roll against my pants when I’m done with them to smooth down any stray fibers.  Be gentle!!  You don’t want to squish out that core of air.


115_5469  115_5470

Sometimes it’s easier to roll the fiber around a knitting needle or dowel with slippery fibers.


115_5471


That’s it!  You can spin directly from these or attenuate/draft them into roving to spin.  I like to make the batt into rolags, then divide the resulting pile into the number of plies I want (in this case, two).  You could also split the batt ahead of time and keep the rolags separate. 


Rolag power!