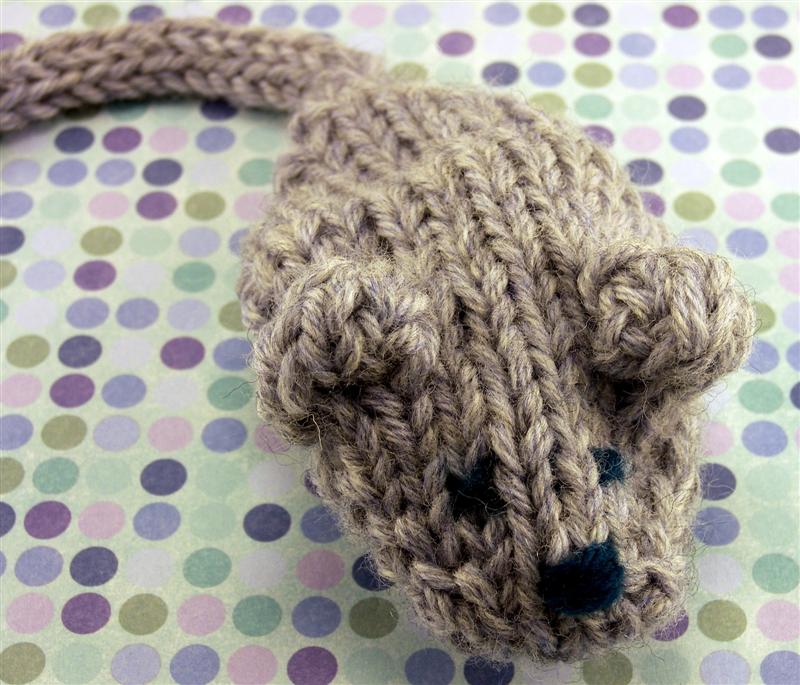
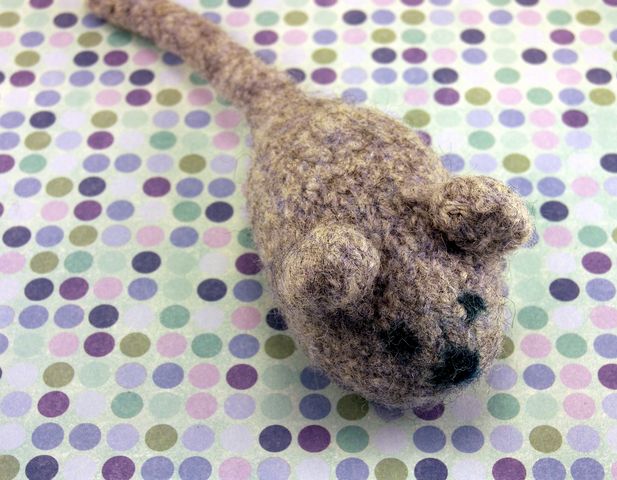
Things are finally back to normal around here. There was much visiting of family and fun, although very little knitting. Before disappearing into the strange world of Noyarnia, I mentioned a felted mouse toy that I was making. Well, here he is! (Before and after felting.)
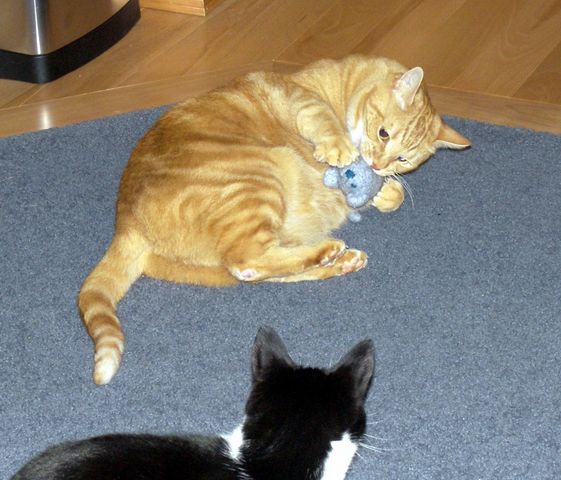
I’ve made two sizes of mouse, because my cats like very different toys. Arwen, our older cat, loves big toys that reek of catnip. (She’s a big kitty and she looooves felted wool.)

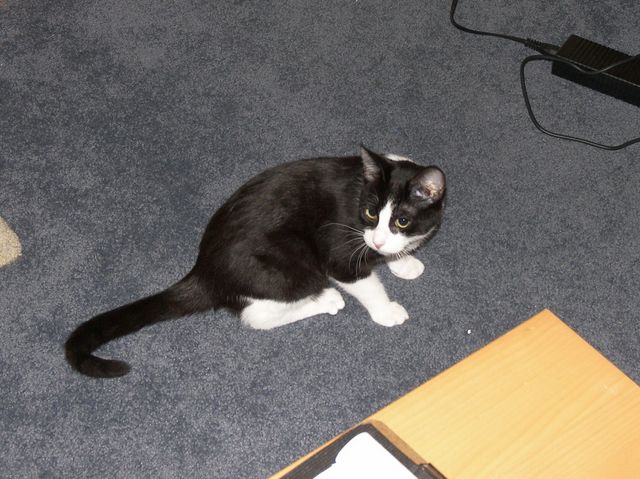
Kif, our younger and much smaller cat, is indifferent to catnip and only likes toys that he can carry comfortably in his mouth. (He’s hard to get a good picture of.)
Well, enough about my cats. I bet you’re just itching to know how to make one of those mousies.
Felted Mousie
Download the PDF: Felted Mousie
Update 5/23: I’ve fixed the increases for the mouse head. I have no idea what happened when I originally wrote it up- those increases made NO sense. If I didn’t know better, I’d say I was drunk when I wrote it. Anyway, I apologize to anyone who tried to make the mouse with those funky instructions!
Update 5/26: Fixed the number of stitches between the mouse ears. Corrections in purple.
- Yarn: Any feltable, worsted weight wool (I used Knit Picks Wool of the Andes in Lake Ice Heather) plus a few inches of contrasting yarn for details.
- Yardage: Small mouse approx 15 yards
-
Large Mouse approx 30 yards
- Needles: Small mouse, size 7 dpns
-
Large Mouse, size 10 dpns
- Other materials: Tapestry needle, toy stuffing, catnip, sewing needle and coordinating thread.
- Gauge: Not really important, since the mouse will be felted.
Prefelted Measurements: Small Mouse, approx 2.25″x3.5″ (not including tail)
Large Mouse, approx 3.25″x5″ (not including tail)
Postfelted Measurements: Small Mouse, approx 1″ x 2.5″ (not including tail)
Large Mouse, approx 2.5″ x 3.5″ (not including tail)
Special Stitches
Make Bobble: Kf&b twice in the next 2 sts. (8 sts increased.) Turn, purl 8 sts just increased. Turn, k 8 sts. Turn, p2tog four times. Turn, k2tog twice. Continue row as instructed.
Mouse Head
For large mouse, work with yarn held doubled. For small mouse, work with one strand.
CO 4 sts to each of 2 needles, using Judy’s Magic Cast On. 8 sts
Round 1,3,5,7,: Knit
Round 2: K1, m1, k2, m1, k2, m1, k2, m1, k1 (4 sts increased.) 12 sts
Rearrange sts as desired.
Round 4: K1, m1, k4, m1, k2, m1, k4, m1, k1 (4 sts increased) 16 sts
Round 6: K1, m1, k6, m1, k2, m1, k6, m1, k1 (4 sts increased) 20 sts
Round 8: K1, m1, k8, m1, k2, m1, k8, m1, k1 (4 sts increased) 24 sts total
Knit 1-2 rounds even. (More rounds give the mouse a longer face.)
Ears
Next round: K2, Make Bobble, k4, Make Bobble, knit to the end of the round.
Knit 3-5 rounds even. If you want a longer mouse body, knit more rounds.
Mouse Butt
Round 1: K1, k2tog, k6, ssk, k2, k2tog, k6, ssk, k1 (4 sts decreased.) 20 sts
Round 2, 4, 6: Knit
Round 3: K1, k2tog, k4, ssk, k2, k2tog, k4, ssk, k1 (4 sts decreased.) 16 sts
Round 5: K1, k2tog, k2, ssk, k2, k2tog, k2, ssk, k1 (4 sts decreased.) 12 sts
Round 7: K1, k2tog, ssk, k2, k2tog, ssk, k1 (4 sts decreased.) 8 sts
K2tog around. (4 sts decreased.) 4 sts
Small Mouse only: K2tog, k2. 3 sts remain.
Tail
Small Mouse: Work 3-st I-cord until tail is at least 2” long.
Large Mouse: Work 4-st I-cord until tail is at least 2″ long. (My cats like a long tail, so I knit the tail about 4″ long.)
Embroider eyes, nose, etc in scrap yarn on the face below the ears.
Felting
The small mouse can be felted by hand in about 10 minutes. Run some hot water (about as hot as you can comfortably stand) in the sink and dip your mouse in. Add some soap to the mouse and start to rub and squish him vigorously between your hands. (This might be a fun thing to make- um, ask your kids do for you.) When your mouse has lost his stitch definition and is the right size (keep felting him to make him smaller,) rinse him in cold water and set him aside to dry.
The larger mouse can be felted by hand (takes a bit longer than the small mouse) or in the washer. If you’ve got any other felting projects, you can throw the mouse in with them.
For more information on machine felting, check out this article on Knitty.
When the mouse is felted and dry, cut a small hole in the underside, stuff with toy stuffing and catnip, sew the opening back up, and give to the cat.
Success!
Please Note: I post my patterns as soon as I’ve completed them because I’m excited to share them with you. They have not been fully tested. They are free, though. I’ve made every effort to make sure that the instructions are clear and error-free. There may be typos or other mistakes and if you find them or have any questions, please let me know by posting a comment or emailing me, dailyskein at gmail.com.

This work by Cailyn Meyer is licensed under a Creative Commons Attribution-Noncommercial-Share Alike 3.0 United States License.

Absolutely adorable, I think my cat NEEDS one or two of these. She keeps running of with small knitted items and drowning them in her water bowl!
Correction on Ears – I knitted 4 stiches between the bobbles since the top half of the mouse was 12 stitches at that point. I’d also add to knit the other 12 stitches even though it is obvious that you have to.
I used some leftover 100% Angora to make my mousie. My kitties will have a rabbit mouse!
Thanks for the pattern.
Thes mice ar adorable! Now I know wha tI am making for my “Grandkitty” for Christmas.
Thanks
[…] Felted Mousie […]
[…] you are interested in making one of these cuties for your kitty, you can find the pattern HERE. I certainly will be making […]
[…] As a peace offering I decided to knit her a little toy. I settled on a Felted Mousie which I originally found on Cailyn Meyer’s ravelry. I didn’t felt it or knit […]