The Daily Skein

All the craft that’s fit to make.

Book Pillow April 22, 2009

Filed under: patterns,Sewing Projects — Cailyn @ 7:20 pm
Tags: , ,

This:


102_4422

is a sickness.

Yes, that is me, reading and knitting at the same time.  Am I crazy?  ADD?  There’s no cat around, so I can’t be turning into a crazy cat lady.  Elizabeth Zimmerman recommends reading and knitting at the same time to help get through those long stockinette or garter sections of a sweater.  After all, once you’ve been knitting for a little while, the modest act of making a knit stitch doesn’t really require much brain power.  We all knit while watching TV, right?


Recently, there’s been a glut (yes, I said glut) of books that I want to read.  Some of them are knitting books, like Cookie A’s book Sock Innovation or Wendy Knits’ Socks from the Toe Up.  Some of the other books are fiction and a lot of them are non-fiction about nutrition, cooking, and exercise.  I also have a glut of ideas for knitting projects.  Basically, I’ve got far too many things that I want to do than I have time for.  So I’ve started reading while knitting, especially great for when there’s nothing good on TV.  After doing a number of complicated socks for submissions, I’m designing some simpler patterns (albeit with interesting construction) which have a lot of stockinette in them.  Not to mention the languishing cardigan.


But books are hard to hold open without hands.  (Why isn’t everything spiral-bound?)  Last night, I kind of tucked the book under my extra belly and propped it up on my thigh.  The problem was, of course, that the book ended up more or less hard to see, especially with the knitting in the way.  Even when I’m not looking at it, I like to hold the project where I do when I look, which is about mid-chest.  So, I came up with a solution: the Book Pillow.

102_4421

Basically the Book Pillow is a pillow (who’d have guessed?) that has some elastic on the corners to hold the book open.  I used Lastin, which is transparent so that I can read through it in case the elastic covers some words.  It works great.  And it only took about half and hour to make.  Here’s how to make one!


Book Pillow

Supplies

  • Two pieces of fabric, each big enough to cover a lap or pillow form (I cut mine 17×11″, with a 1/2″ seam allowance)
  • Four 8″ pieces of elastic such as Lastin
  • Poly-fil stuffing or a pillow form
  • Sewing machine, pins, thread, needle


Place one piece of fabric right-side up on the table.  Take one of the elastic pieces and lay it diagonally on the fabric so that it forms a right triangle with the corner of the fabric.

102_4408 


Place the other three pieces in the same manner on the other corners.

102_4411


If you want, put a book on the fabric to check the placement of the elastic.  I moved them around so that the elastic crossed just inside the seam allowance.  I didn’t spend a lot of time making sure that the angles all matched up; I just eyeballed it.  Two pieces of my elastic are shorter than the others.

102_4410


When you’ve got the placement of the elastic where you want, carefully place the other piece of fabric right-side down on top of the one with the elastic.  Pin in place, making sure to catch the elastic in the pin so it doesn’t move around.  You don’t have to stretch the elastic, since holding the book will do that, but you can stretch is slightly if you’d like while pinning.

102_4416


Sew around all four sides, leaving a hole for turning and stuffing.  If you’re using a pillow form instead of poly-fil, leave a hole big enough to stuff the pillow inside.  When the sewing is finished, turn the pillow right side out, clip the corners, and press if desired.


Stuff the pillow with the chosen filling until it reaches the firmness you like.  I stuffed mine firm but still kind of squishy.  It needs to be stiff enough to keep the book from closing.  I tested a book on it during the stuffing stages to see which I liked best.  Once you’re done stuffing, sew up the turning hole (I like to use slip stitch).


Enjoy your new ability to read and knit at the same time!

102_4423

The book in the pictures is Real Food by Nina Planck.


YCD June 20, 2008

Filed under: patterns,Sewing Projects — Cailyn @ 11:31 pm
Tags: , ,

So, yarn hates me right now. All I want to do is to love it (and force it to contort into thousands of tiny loops) and it stabs me in the back by getting tangled, eaten by the cat, and just in general being a pain in the butt. I would like to declare a knitting hiatus… but my hands are shaking at the mere thought of having to watch the Daily Show without something to occupy them, so maybe that’s not a good idea. I’m not sure how to solve this problem, but today I spent some time sewing instead of knitting again. I still had 2 more reusable shopping bags to make today as well as a few that I want to make for someone who will remain nameless. By the time I’m done with all of them, I’ll have made 12 shopping bags in just a few weeks! That’s a lot of sewing for me. I’m planning on making myself a new knitting bag (I got some gorgeous fabric on sale) if I can face my sewing machine after all this. While taking a break from shopping bags, I made this:
 

The YCD– Yarn Containment Device. The idea is to keep a ball of yarn from rolling around the floor while you try to knit from it. (I have a ball winder that makes center pull balls, so for me this is mainly to keep cats from playing with the ball.) I’ve seen all kinds of ways to do this, from putting the ball in a pot by your side to making one from an old soda bottle. (Some aren’t as fancy as that one, though.) The problem with the pot and the soda bottle is that they’re not very portable. Or pretty. You can accomplish the portable with a Ziploc baggie, but that still doesn’t solve the pretty. 🙂 Hence the pretty, squishable YCD!

The YCD I made today is about a 4″ cube (it’s a little taller than it is wide, but I’m not going to go get it to measure it.) It’s just about right to fit a skein of Louet Gems Pearl, which you can see in there. It’s got a ribbon drawstring. I wanted to use a cord stop, but I’ve run out so I just tied the ribbon in a bow. The YCD has some heavy interfacing on the bottom to help it stand up, but the sides are just two layers of cotton so that they squish nicely for storage or portability.

I’m planning on making more of these; they’re a great way to use up some fabric stash! This one was pretty fast to make, too, and I was making it up as I went along! It’s not perfect yet… I’d like to use fusible interfacing on the bottom for easier placement and probably make the top a little differently. Further experiments on the specimen are required, but if you’d like to try your hand at making one of these, read on!

The 4″ Yarn Containment Device

Supplies:

  • 2 fat quarters or equivalent amount of fabric and a 3″ x 17″ piece of coordinating fabric
  • 4″ square of heavy interfacing (fusible recommended)
  • 18-20″ ribbon or cord
  • Sewing machine, iron, freezer paper (optional,) pins, sewing needle

This project uses 1/2″ seam allowances.

On freezer paper or directly on fabric, draw the shape for the Device. The Device is based on a “plus” shape that is then folded up to make the bag. I start by making the 5″ square in the center, then measuring out the side rectangles, 5″ x 4.5″ on each side. You can see in the picture that I didn’t use a big enough piece of freezer paper and had to use masking tape to tape the sides on, lol! Cut one from the outer fabric and one from the lining.

Place a ruler on the cut piece, running from one inner corner diagonally to its opposite. Draw a line about 1/2″ long along the ruler, starting from each corner. (Since that made almost no sense, I hope the pictures help.) Carefully cut along the lines just drawn. These cuts enable the bag to fold correctly for sewing. If you’ve got fusible interfacing, you should fuse it to the wrong side of the outer fabric in the center of the plus shape now. Use the cuts as a guide for centering. If you don’t have fusible interfacing, read on!


Fold the piece in half, right sides together, so that two of the sides line up and pin in place. (See why we cut those slits now?) Sew along either of the outer sides with a 1/2″ seam allowance, from the top to the end of the slit. Don’t worry if the slit doesn’t reach the stitch line or overshoots a little, you won’t be able to tell when it’s all done.


Repeat for the other 3 sides, realigning as needed, and sew the lining the same way. (Don’t leave a hole for turning!) Trim the seam allowances to 1/4″ and turn the outer fabric right side out. Leave the lining wrong side out.


Put the outer fabric into the lining, line up the top edges, and pin into place. Sew along the upper edge, leaving a 2″ gap for turning.

Turn right side out. If you’re using plain interfacing, curl the 4″ piece up a bit and shove it through the turning hole and position it correctly. Press the top edges if desired.

Take your 3″x17″ strip of fabric (or cut it now) and fold it in half width-wise (so that you now have a long 1.5″ strip.) Press. Open it up and fold one short edge down about a 1/4″ (don’t worry about the other short edge for now.) Now, fold one long edge down to the fold line. Press. Do the same on the other long side. You’ve now got a 1″ x 17″ strip.


Open up the strip you just spent so long pressing so that you can see the center line, but the two sides are still folded in. Mark a place (anywhere, really) on the strip for two button holes. Follow your sewing machine’s instructions for making button holes. This is where the drawstring will come out. The button holes will sew through 2 layers of fabric.

Put the strip on the top of the bag, overlapping the bag by about a 1/4″. Pin in place. Hide the raw end of the strip under the pressed edge of the strip. If there’s more than a 1/2″ overlap, trim the raw end. Try to line up the button holes with the center of a side. (You can see that I didn’t really do that very well…)


Topstitch around the bottom of the strip, starting just after the pressed edge of the strip. This part was a little dicey for me, but I think it worked out well enough. Slip stitch the pressed edge to the strip section beneath it. Thread the ribbon or cord through the button holes, trim off any extra, and you’re done! Throw a ball of yarn in there and get knitting!

This YCD is good for very small balls of yarn or center-pull balls that won’t move. Depending on the size of your ball, you’ll want to make the Device larger.


Creative Commons License
This work by Cailyn Meyer is licensed under a Creative Commons Attribution-Noncommercial-Share Alike 3.0 United States License.


Cuddly Balls May 29, 2008

Filed under: Patterns,Sewing Projects — Cailyn @ 3:26 pm
Tags: , ,

I’ve taken a short break from knitting to work on one of my other loves, sewing. Now, sewing and I have had a rocky past. It hasn’t always been pretty. But we seem to have come to an understanding now. I don’t sew clothes. (Well, maybe a skirt now and then, but that doesn’t count.) No shirts, no pants, nada. I don’t care how “simple” the pattern is. And sewing has finally come to accept that and now enjoys helping me make cool knitting bags and toys. Two things have really made my sewing much better:

Freezer paper. This stuff is awesome. You can iron it on to your fabric, draw on it, cut through it or around it, I’ve even used it as a tear-away stablizer when I’m desperate… then you just peel it off and it doesn’t leave a residue or tear! And it’s reusable (it does lose its effectiveness after 10 uses or so.)

Blindstitch (or slipstitch, the descriptions sound very similar to me.) Why didn’t anyone ever teach me this before?? All those projects I stuffed and sewed shut with whipstitch; I shudder to think of them. I freaking love blind/slipstitch. It’s almost completely invisible and easy to do. Kind of reminds me of grafting in knitting, in a good way. I tried to make my own blindstitch tutorial, but I got very frustrated with the macro function on my camera. So while the camera sees a therapist and recovers, use these tutorials: WikiHow with pictures, or YouTube video!

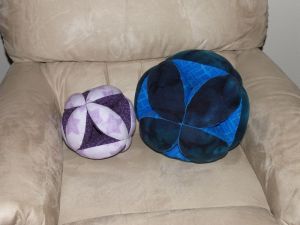
Anyway, I’ve been sewing because my sister is going to have a rough wee soon, and I thought I would make her something cuddly to cheer her up. Luckily she was visiting not too long ago, so I got lots of good ideas, even though I was planning on using them for the holidays. She was admiring my big “puzzle ball” that I made a few years ago. Which is a story in itself!

My grandmother-in-law always comes to me first when she wants to give handmade gifts to the family (I love this woman!) There was a sudden outbreak of great-grandchildren one year and she asked me to make some baby toys. I made these:

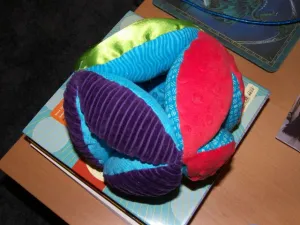
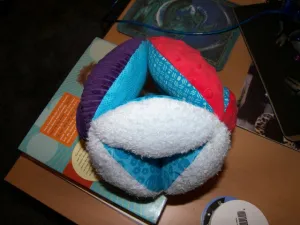
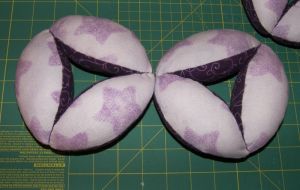
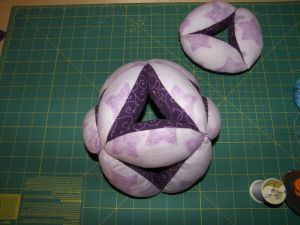
They’re puzzle balls, with coordinating fat eighths as the base pieces and then a different color and texture as the top piece. There’s fuzzy blue (which looks white in the pictures,) bumpy red, ridged purple, and smooth green. Oh, and they also have bells inside. I’ve heard they were a big hit. These ones were about 5” in diameter.

I made a larger one for myself, and it’s main purpose is apparently to be thrown at some unsuspecting guest. It’s made from flannel and cotton. (There’s a picture of it at the bottom of the page.) It’s very squishy and fun, about 10” in diameter. Anyway, back to the main story. I made my sister a puzzle ball, and while I was at it, I took some pictures for a tutorial. I first learned about these balls on Craftster. Take a look at some of the really beautiful ones people made!

These balls are really cool. I like using at least two colors in my balls, one “outer” and one “inner.” There are 36 pieces of fabric, 12 outer and 24 inner, so there are lots of options!

Amish Puzzle Ball

Supplies

Fabric (cotton, flannel, anything really) The amount varies depending on the size of the ball, but I’ve found that 1/2 a yard is plenty for a 6″ ball.

Coordinating thread

Sewing machine (unless you make it really small or are really patient)

Scissors, sewing needle, pins, iron and freezer paper (optional)

Polyester stuffing (or stuffing of choice)

Cutting

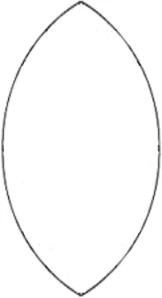
Resize the marquis shape here to your desired size (right click to save it to your computer.)

Keep in mind that there’s a ½” seam allowance, so a 7” template will be a 6” sewn shape. A 7” template makes an approximately 6 ½” diameter ball. You can make the template fatter for a ball with smaller gaps.

If you’re using freezer paper, trace your marquis onto the freezer paper. (I’ve managed to do a whole ball with one freezer paper marquis.) Cut it out.

Iron on your freezer paper template and cut out the marquis shape around the template. I fold my fabric so that I can cut 4 pieces at once, but you need really good scissors for that. Repeat until you have 36 pieces total (if making a 2-color ball, you need 24 MC pieces, and 12 CC pieces.)

Sewing

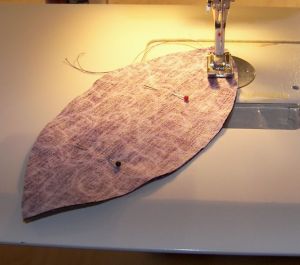
Pin two marquis pieces right sides together. Using a ½” seam allowance, sew one side of the marquis from end to end.

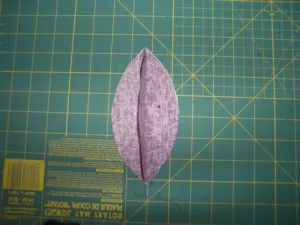
Take the third marquis and place it right side up on the table. Spread the sewn marquis apart and place it right side down on the third piece. Pin in place. It should look like this, but less fuzzy.

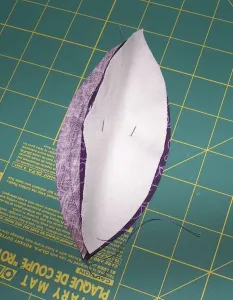
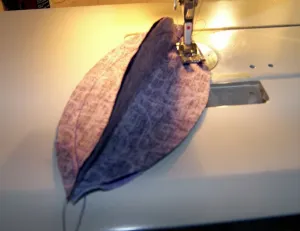
Sew one side of the marquis end to end. Sew the other side, but end about 1” short, for turning and stuffing.

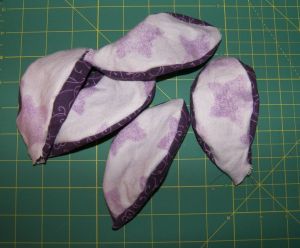
Clip the seams (I like to cut them to about ¼”), turn right side out. Repeat until all pieces are sewn.

Stuff with Poly-fil to desired squishyness. Sew opening closed with blind/slipstitch. Repeat until all pieces are stuffed.

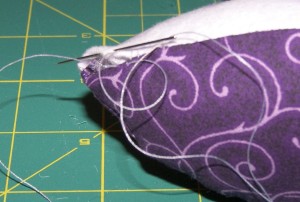
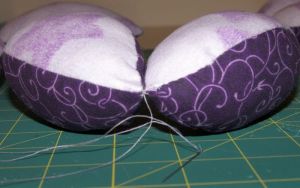
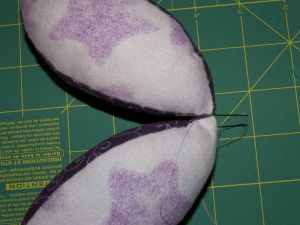
Sew two pieces together at the tips. I use blind/slipstitch to sew them together about ½” for a more solid ball in larger sizes.

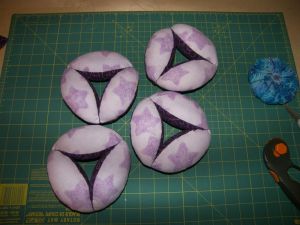
Sew a third piece to the previous two to form a triangle.

Repeat until you have 4 3-piece triangles.

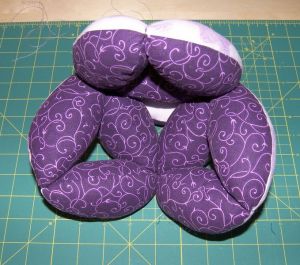
Sew two of the triangles together at the “point.” I use blind/slipstitch again, ½” on either side of the center.

Sew a third triangle to the two the same way.

Fold the triangles up so that the first and third touch and sew together the same way as before. You can also sew the fourth triangle on and then fold it up, but I think the first way is easier. Now you’ve got some sort of dome.

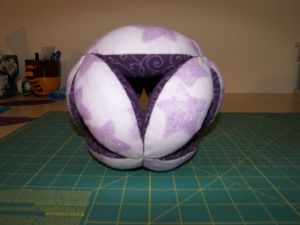
Sew the fourth triangle on in the same way, sewing each point to a point on the dome.

Finished!