This was supposed to be up much sooner this week, but we’ve had some Internet problems and been pretty busy. Anyway. Enough about me, on to the braid!
Edit 8/20/08: I can’t believe I didn’t actually link this back to the project it’s used in! The vikkel braid is used in the Arthurian Anklets. And probably other projects in the future.
I first learned about the vikkel braid in Nancy Bush’s Folk Knitting in Estonia. This is a great book if you’re interested in historical/traditional knitting. She has instructions for 3 different braids in the book; all make the stitches look like they’ve tipped over onto their sides, but all made very differently. According to the book, vikkel is the word for stitches that cross over each other, which is just how this braid is worked. This braid looks so nice on socks and mittens and it’s sure to bring questions of “How did you do that?!” As you’ll see, it’s pretty easy to get such adulation.
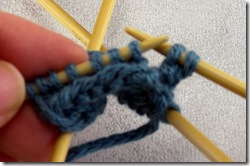
Step 1: Increase 1 stitch using an M1 increase.
Step 2: Place the stitch just made back onto the left needle.
Step 3: Bring the right needle behind the left needle, knit the second stitch on the left needle through the back loop,
then knit the first stitch on the left needle through the front as normal. (Getting the right needle around the left needle tip smoothly takes a little practice, but you’ll get the hang of it.) Drop both the first and second stitch off the left needle.
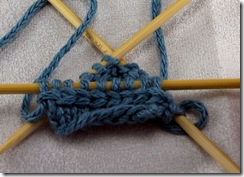
Repeat Steps 2-3 until the end of the round, rearranging stitches as needed. Give the working yarn a good pull right before slipping the stitches off the needle to keep the tension right.
At the end of the round, slip the last stitch over the first stitch of the round to get back to the original stitch count.
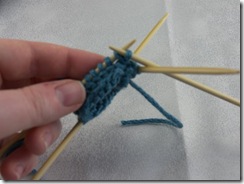
See, I told you it was pretty easy. Now, go forth and vikkel!
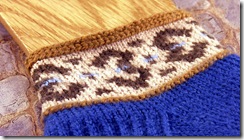
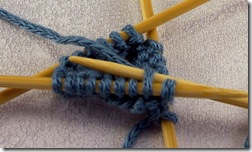
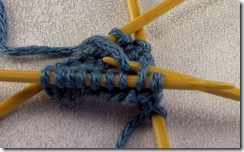
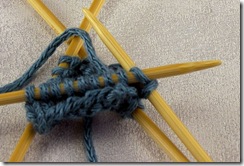
[…] Vikkel Braid: M1 and place stitch just made on left needle. *Knit the second stitch on the left needle through the back loop then knit the first stitch as normal and drop both stitches off the left needle. Return the stitch just made to the left needle.* Repeat from * to * to the end of the round. Pass the last stitch over the first stitch of the round to return to the original stitch count. Picture tutorial here. […]
I find that horizontal cables/vikkel braids work better if you avoid knitting the second stitch—just slip it. (If you knit it, it will be too loose. If you slip it, it will be a little too tight, but not by that much.)
I do this by going: make 1, then *slip 1 knitwise, then insert left needle from right to left through 2 stitches, sort of as if to k2tog except with the needles switched, and remove right needle. This gets two stitches on the left needle, switched. Slip 1 as if to purl, then knit 1.* Repeat between *s. I like to skip the knit 1 on the last stitch, too.
I just wanted to say thanks for the lesson on how to make a vikkel braid I’m currently working on a pattern for socks from the knit1 magazine and it called for two vickel braids and the instructions in the magazine weren’t quite clear for me because I’m a very visual learner and I love that you do your how to with step by step pictures thanks again you saved me much frustration
[…] heb trouwens ook weer een nieuwe techniek geleerd, de Vikkel Braid. Dat is dat kleine vlechtrandje langs de […]
[…] med disse sokkene er den langsgående stripa oppe, rett etter vrangborda. Det er en såkalt “Vikkel-braid”. Det er vel den nye “tingen” jeg har lært gjennom denne […]
[…] The Vital Statistics: Pattern: September 2009 Mystery Sock (Fox Faces Socks) by Nancy Bush (rav-link) Yarn: Patons Patonyle 50g balls, hand-dyed canary yellow by me. Needles: 2.25mm Knitpicks fixed circular, Magic Loop method Modifications: I upped the stitch-count from 60 to 72, to fit the recipient, used Nancy’s Estonian Cast-on, which is desperately cool, and made my very first ever Vikkel braid. […]
Ariel, you’re a lifesaver! I tried and tried to get the vikkel braid to come out right. Your method worked! Perfectly!
[…] That done, I cut off the top just above the cable, lengthened the ribbed cuff, threw in my first vikkel braid, knitted another repeat and a half of the cable pattern, and — here’s the badass part — […]
Appreciating the persistence you put into your site and in depth information you offer.
It’s good to come across a blog every once in a while that
isn’t the same unwanted rehashed information. Wonderful read!
I’ve bookmarked your site and I’m adding your RSS feeds to my Google account.
Your instructions are very nice and clear. I have found a fairly good compromise between the regular method and what Ariel suggests abut slipping that second stitch from behind. I just re-order the stitches and knit them in the new order. There is less stretching on the following row, although it is not completely gone. I also pull snugly on the first stitch when I knit it, before knitting the second stitch which will be moved back to the left needle.
If you want the stretching completely gone, then slip that second st. as Ariel suggests and realize that when you knit the next row you are just completing the total process of making the braid. So if you want space before the next pattern stitch, you still need another plain row.
This is an intriguing design and I will enjoy using it in mittens or a hat.
I fist used it as a single color line across a scarf, and loved it. The two colors do not pose a tension problem,.